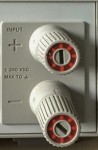
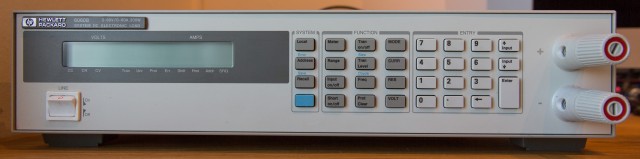
HP 6063B Front Binding Posts
A few weeks ago I scored an
HP/Agilent/Keysight 6060B DC Electronic Load on eBay. Unfortunately most of these come without front binding posts as they are optional (Option 020) and have to be paid extra for. As I'm using this as a bench DC load and not in a rack-mounted test setup I wanted to have these. Luckily I had access to a
HP/Agilent/Keysight 6063B DC Electronic Load with front binding posts, which is basically the same DC load with just less current and more voltage specs.

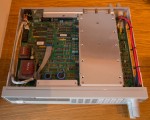
HP 6063B Cable Connections
So I tore down that unit to find what is different compared to my unit and what I would need to change. It appeared that the only differences are actually the bindings posts itself with a small plastic label panel which sits between them and the front panel and two thick cables connecting the bindings posts on the front with them on the backside. Luckily HP did a great job and provide a
Service Manual for unit, which confirmed my findings and show the individual parts needed. Figure 5-1 on page 78 gives an overview of the chassis components and I thought that I would have to get
- 2 Binding posts 1510-0134,
- a Label Panel 06060-40003,
- a Cable Assembly 06060-80015,
- and a few screws, washers and nuts.

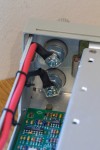
HP 6063B Cable Routing
Keysight provides a
Find-A-Part service for replacement parts which I searched for the need parts. Unfortunately the label panel and the cable assembly are obsolete. I did not worry to much about the cable assembly but I was not sure if the binding posts would fit without the plastic panel between them and the front panel. So I wrote to the Keysight customer service and asked about the part. They told me that this part has been discontinued as the the information which binding posts is + and which one is - is now printed directly onto the front panel. As the front panel itself is made of 2 mm aluminium I took the risk and ordered the rather costly two binding posts (41.36 € each).
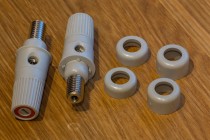
Binding Posts (P/N 1510-0134)
After five weeks I received the binding posts. They come with two different size brackets most likely for the usage as back binding posts and front binding posts. There are no screws, washers and nuts included so you will need two M12 nuts, two M12 spring rings, two M5x12 screws with a cylinder head and two M5 washers.

Plastic front cover
For installing the binding posts the front cover has to be disassembled. This is done straight forward by opening the case, disconnecting all the cables and removing the screws on the side and one screw next to the LCD display. To remove the aluminium part off the plastic front cover the power switch has to be removed. The pull the aluminium plate gently off as it is glued onto the plastic part. I recommend NOT to remove the keypad and the display as the plastic bolts break easily (I lost three of them at the keypad). As the plastic front cover is already prepared for the front binding posts with two holes only the aluminium part has to be modified. I asked someone with the right tools to do me a favour and drill the two holes into the plate and add the small noses which will prevent the binding posts from rotating. Note that these have different sizes for the top/bottom and left/right and that the binding posts should be mounted in such a direction that the hole for the cables can be accessed from the sides.
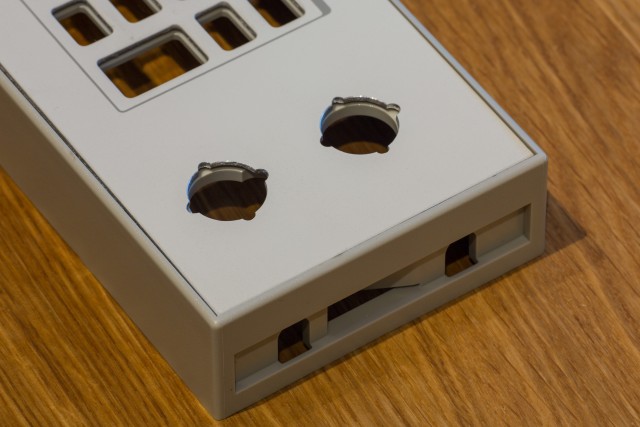
Holes with alignment traps
Front Binding Posts
After mounting the binding posts and reassembling the front cover I connected the front binding posts with the rear binding posts with an 10 mm² (AWG 7-8) cable with two cable shoes with an diameter for M5. The cable itself was mounted onto the side with cable ties like in the 6063B. The label the front binding posts with + and - I used an Epilog Laser-Cutter Zing 6030 with 40 Watts of power at the local fab lab "
Die Werke" to engrave the labels. With a setting of 25% speed and 40% power I received good results, which means that the lamination was burned away and the underlying aluminium was visible. I tried several settings before drilling the holes at their position as I wanted to have a perfect try for the real labels.
Front with installed binding posts
Top view with everything installed
Before installing everything again I did a quick functional test to assure to everything works. It works like a charm and looks very professional like it was installed already by the manufacturer. So I'm quite happy with this upgrade and can recommend it to everybody!
PS: In case you're looking for the terminal blocks on the backside they have the Molex part numbers 39530-0010 (10 pin) and 39530-0004 (4 pin) and are available at Digikey under WM7824-ND (10 pin) and WM7953-ND (4 pin).
Hello Tobias,
Thank you for posting this! The information you provided here was very helpful for me while I was working on installing front panel posts in my own HP 6060B.
I didn't have access to a laser cutter, however, so improvised a bit. I 3D printed a small plate to put between the front panel and the binding posts. This plate has notches in place to keep the posts from rotating. While its not nearly as elegant as your solution, it was the best I could do with the tools I have on hand.
On my Github I've created a repository with the OpenSCAD model I used to create this panel along with some documentation of my own build. This may prove useful as a starting point to others seeking to solve the same problem via additive manufacturing/prototyping so I've included the link below. 🙂
https://github.com/fivesixzero/hp-6060b-front-binding-post-mod
Hey Erik,
Really glad to this post helped you and your result and detailed descriptions are really awesome!